Contents
Jimdo Review: A website builder that’s both inexpensive and easy to use
With 95 percent of the edits being made simply by clicking on what you see, Jimdo is a very easy to use What You See Is What You Get (WYSIWYG) website builder. Suitable for a variety of different business types, its simplicity is one of its biggest selling points, making it easy for users with little technical know-how to build a sharp-looking website. While the platform is easy to use, the help desk response is slow (at least for the free version) and there’s a few minor features that we wouldn’t mind seeing added. Despite the shortfalls, Jimdo is still worth a look for some, especially considering the lower-than-average price.
Getting Started with Jimdo
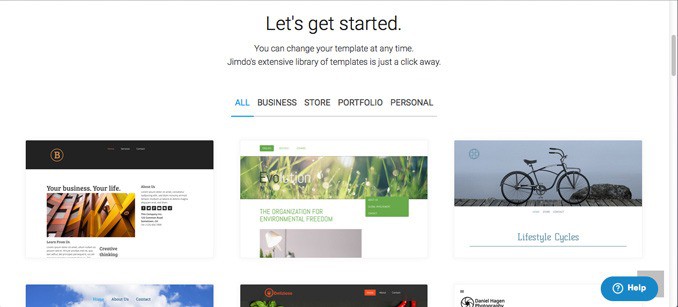
New users start with choosing a template first. The amount of available templates was a little disappointing—32 in all, where many other web builders have hundreds. It is refreshing, however, to see templates for a typical business and a store as well as a portfolio options that are more suited for photography and design companies. Regardless of the smaller selection, the available options are clean, modern and well-designed.
With the template created, new users create a log in then are taken straight to the editor, so sign-up takes just a few minutes.
Editing Pages in Jimdo
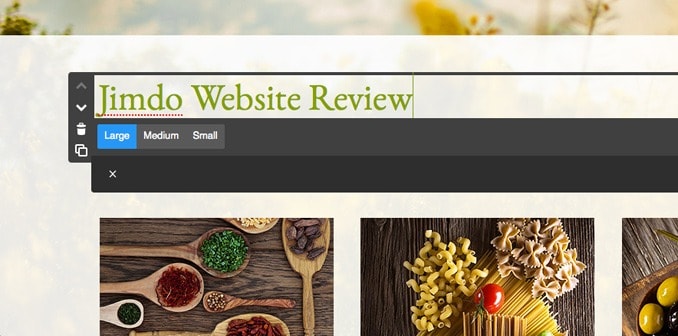
Depending on the template you choose, the site will automatically be set up with a few pages with sample text and images. As a true WYSIWYG editor, clicking on an element allows you to edit that feature, so there’s minimal digging around with How do I change ______? questions. Text, images and other elements can be updated just by clicking on them. Text options are limited, with just three size options, though further changes can be made using the style editor (more on that later).
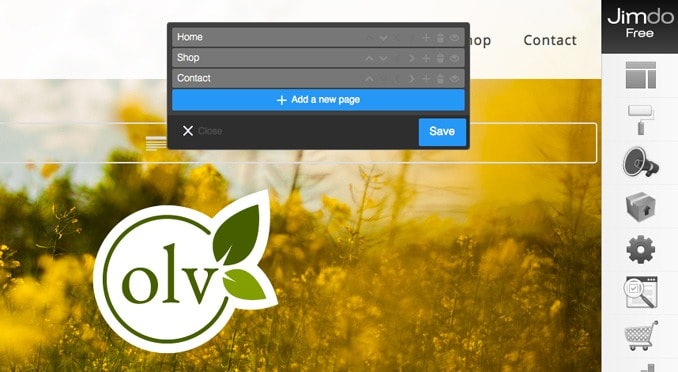
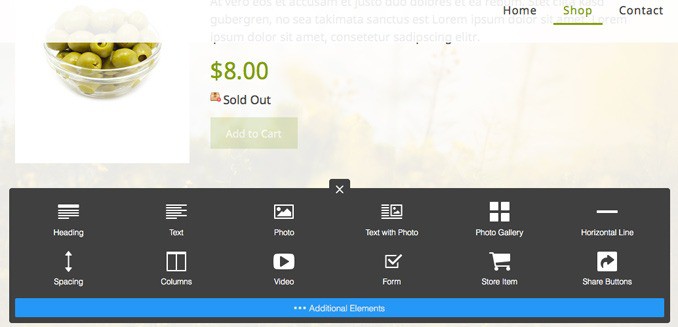
To add a new element, like a text box or image that the template didn’t include, hoover the mouse in the empty space between two elements or at the bottom of the page. The “Add Element” icon will appear, a simple click will bring up the options, like text, images, store items, videos and more. Once added, items can be edited or dragged around to different locations on the page. Clicking on the navigation bar will also allow you to make changes there, or you can use it to navigate to other pages or add a new page. Adding pages starts you from scratch with a blank page, unlike other builders that also have page templates, so all the elements need to be added from scratch, which takes a little longer. Accessing other options is done through the toolbox on the right hand side, which holds all the options that you can’t see on the webpage, like store shipping and tax information. It would be nice if the toolbox moved as you scrolled, but it sticks to the top of the page, so users have to scroll back up to access the options. Certainly not a deal-breaker, but not a time-saver either.
Editing the Design of Jimdo
Clicking on the paint roller or style icon in the toolbox allows users to adjust the template styles. Once in the style mode, edits to a certain element can be made by clicking on that item. Changing the font, for example is accomplished through the style editor and not the regular editor, though changing the font will change all similar text across the entire site (i.e. all headings, all body copy, etc.). Colors can also be adjusted using the style mode, as well as the site background and banner image. Seasoned web designers can click “custom template” within the style editor to use HTML code to adjust the design.
Creating a Storefront in Jimdo
A lot of the work involved in adding a storefront is done underneath the store options in the righthand toolbox, though compared to other options there’s still quite a few store elements completed with the editing mode. Inside the store options window, users have the options to view orders and order archives, view inventory and create or edit discount or coupon codes.
Products, on the other hand, are added just like page elements. Hoover over a blank space and click on add an element, then store item. This approach may be a bit easier for visual learners inexperienced in web design, though for some users it may take a bit longer using this method. Regardless, all the expected product details including images, text and item options can be added here. Shipping times default to 1-3 days, 3-5 and 5-8, though these times can be customized under the settings tab and store settings, along with options like shipping and tax information. Jimdo automatically keeps track of inventory, so by adding the number of products available, the website will be updated when a product is sold out. Alternatively, you can choose infinity as the number of products available.
Along with having a product page, users can also insert a store catalog on any page on their website. Catalogs can include all the products, or just those with a certain tag. The catalog option allows you to display products on more than one page, such as adding featured products to the home page.
Adding a Blog to Jimdo
Adding a blog works much like you would expect after working with Jimdo’s page and store options. Clicking on the blog icon in the toolbar allows you to activate the blog, as well as add a new post. New posts automatically are given a title, date, author name and comment field—but everything else has to be added using the “Add Elements” button, just like on a regular page. This makes it a bit easier to adjust the layout of a blog post, though can also make adding a new post take a bit longer, since nearly all the elements, even the text, need to be added separately.
Jimdo Review: Final Verdict
Since most of the edits are made by clicking on the item, it’s fairly simple to learn how to use the Jimdo platform. The way elements are added to a website in the Jimdo platform is a double-edged sword. It’s helpful because it allows users to add things like a product catalog or the blog feed to out-of-the-ordinary yet useful places—for example, adding a product catalog to a blog post about a new selection or including teaser blog posts on the home page and then full posts on a dedicated blog page. It can also make some processes, like adding a new blog post, take slightly longer. Jimdo also doesn’t have quite as many template options available, which somewhat limits the design of the site. Most elements are customizable, however, to the point where adjusting the fonts, backgrounds and styles offer enough variation. Unfortunately, the help center is rather slow. Paid users get priority help with faster response times (within 24 hours), which is understandable since you get what you pay for, but we still received a much faster response with the free or trial versions of the other web builders we’ve tested. After not receiving a response 32 hours after our request was sent, we used the online chat, and it still took quite a while for a representative to respond. Jimdo is quite similar to Wix in that both platforms are easy-to-use, true WYSIWYG editors. Wix has more templates and offers free public domain images within the editor itself—we also thought it was a little easier to use. But, Jimdo offers the option of using HTML code where Wix does not. The redeeming factor that still makes Jimdo a potentially good choice is the price. The Pro package offers quite a few features including a custom domain name and up to 15 products for $90 a year. Very few web builders allow for a store with that many products for less than $10 a month. For unlimited products and the ability to use features like coupon codes, the business package comes in at a still-reasonable $240 a year. Jimdo is an easy to use website builder—while it has fewer templates and some odd quirks, it’s a worthwhile consideration for business owners ready to build a DIY website.


